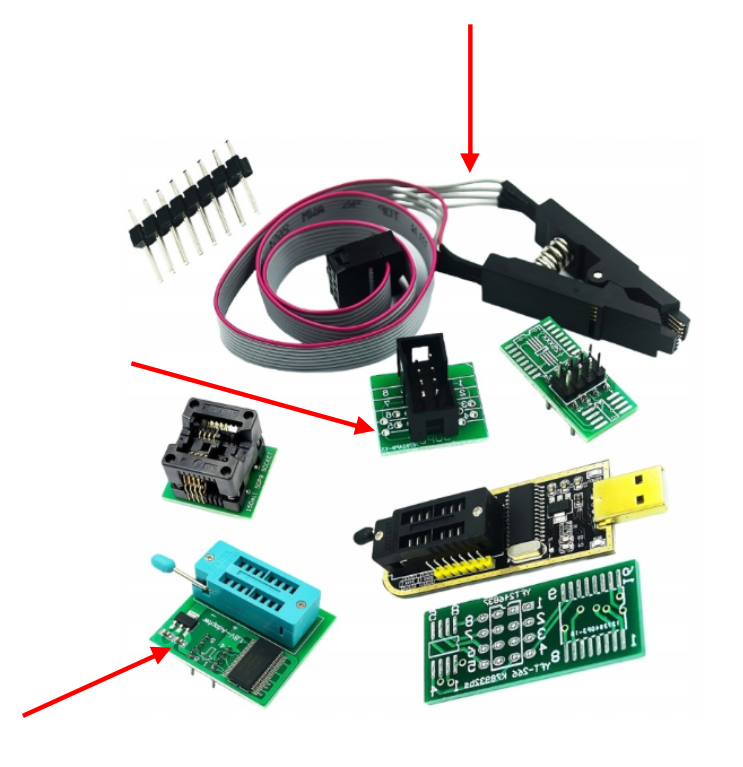
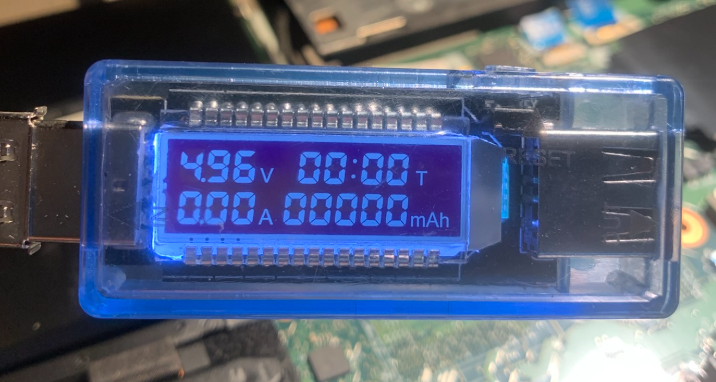
Mechanical assembly of the hardware suite components is simple. Ensure accurate orientation of the peripheral PCB interface board (the green board) and the associated operational voltage selector jumper:
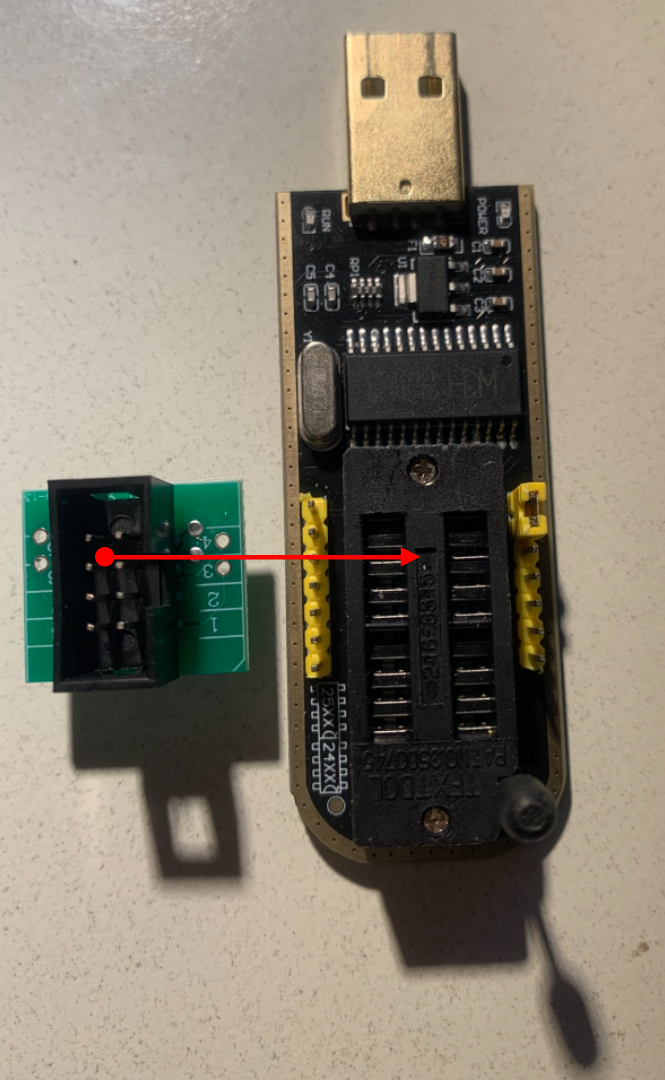
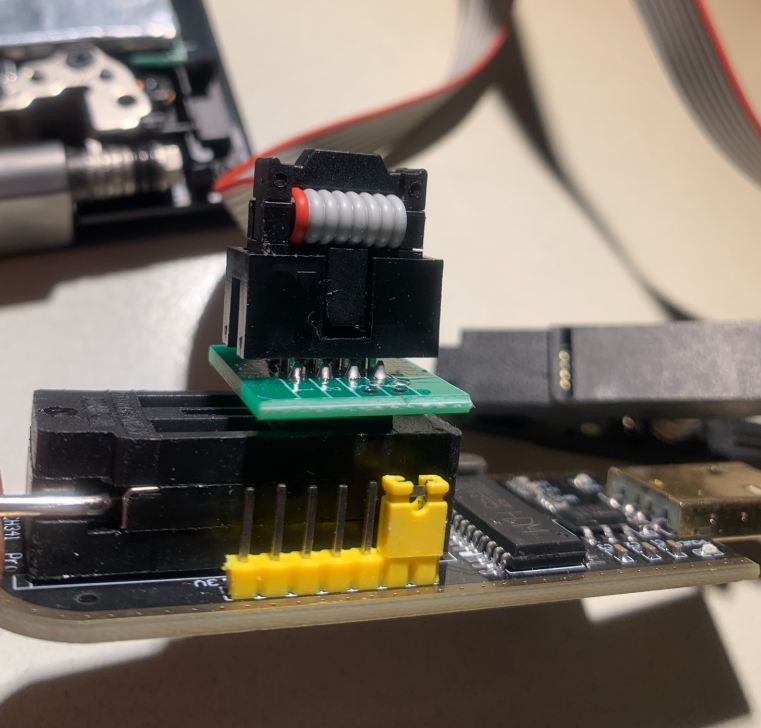
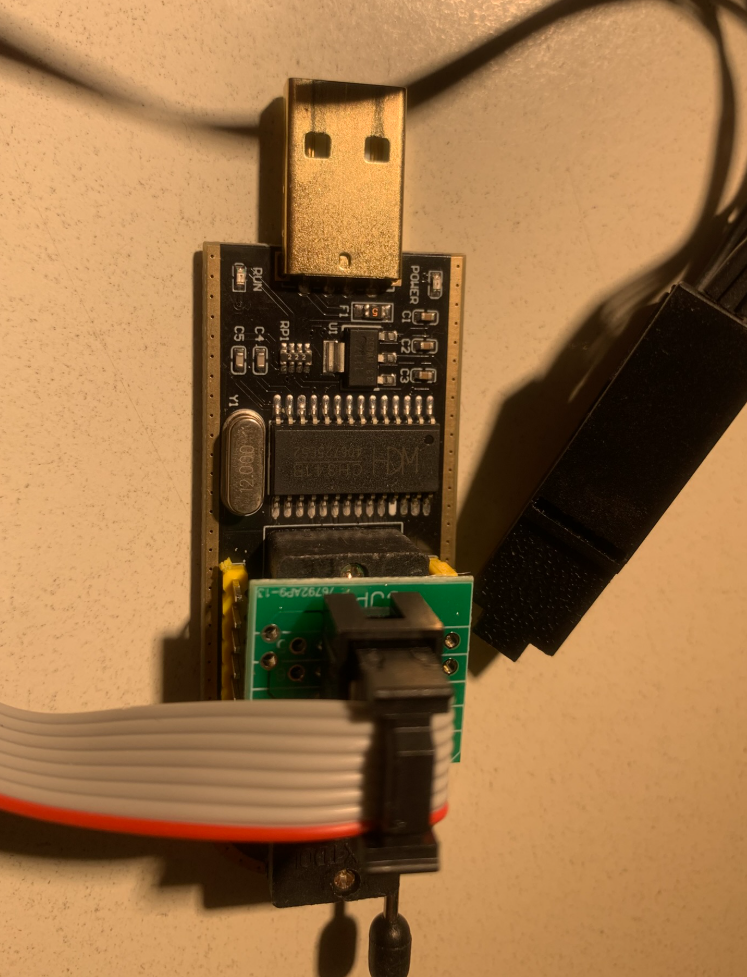
The system deployment and verification sequence is broken down into eight structured execution phases:
Install the required libraries and hardware interface tools:
        cd ~
        sudo apt-get install python3
        sudo apt install flashrom
        mkdir -p ~/T480_i7_bios/lenovo_autopatcher
        cd ~/T480_i7_bios/lenovo_autopatcher

        wget https://oziway.tv/media/lenovo_autopatcher_0.2.zip
        unzip lenovo_autopatcher_0.2.zip
        chmod +x tools/UEFIReplace
Please note that autopatcher has been placed into the current directory but it has been downloaded from github - just in case it disappears from there
Original location was https://github.com/lilianalillyy/t470s-uefi-unlock/raw/refs/heads/main/lenovo_autopatcher_0.2.zip
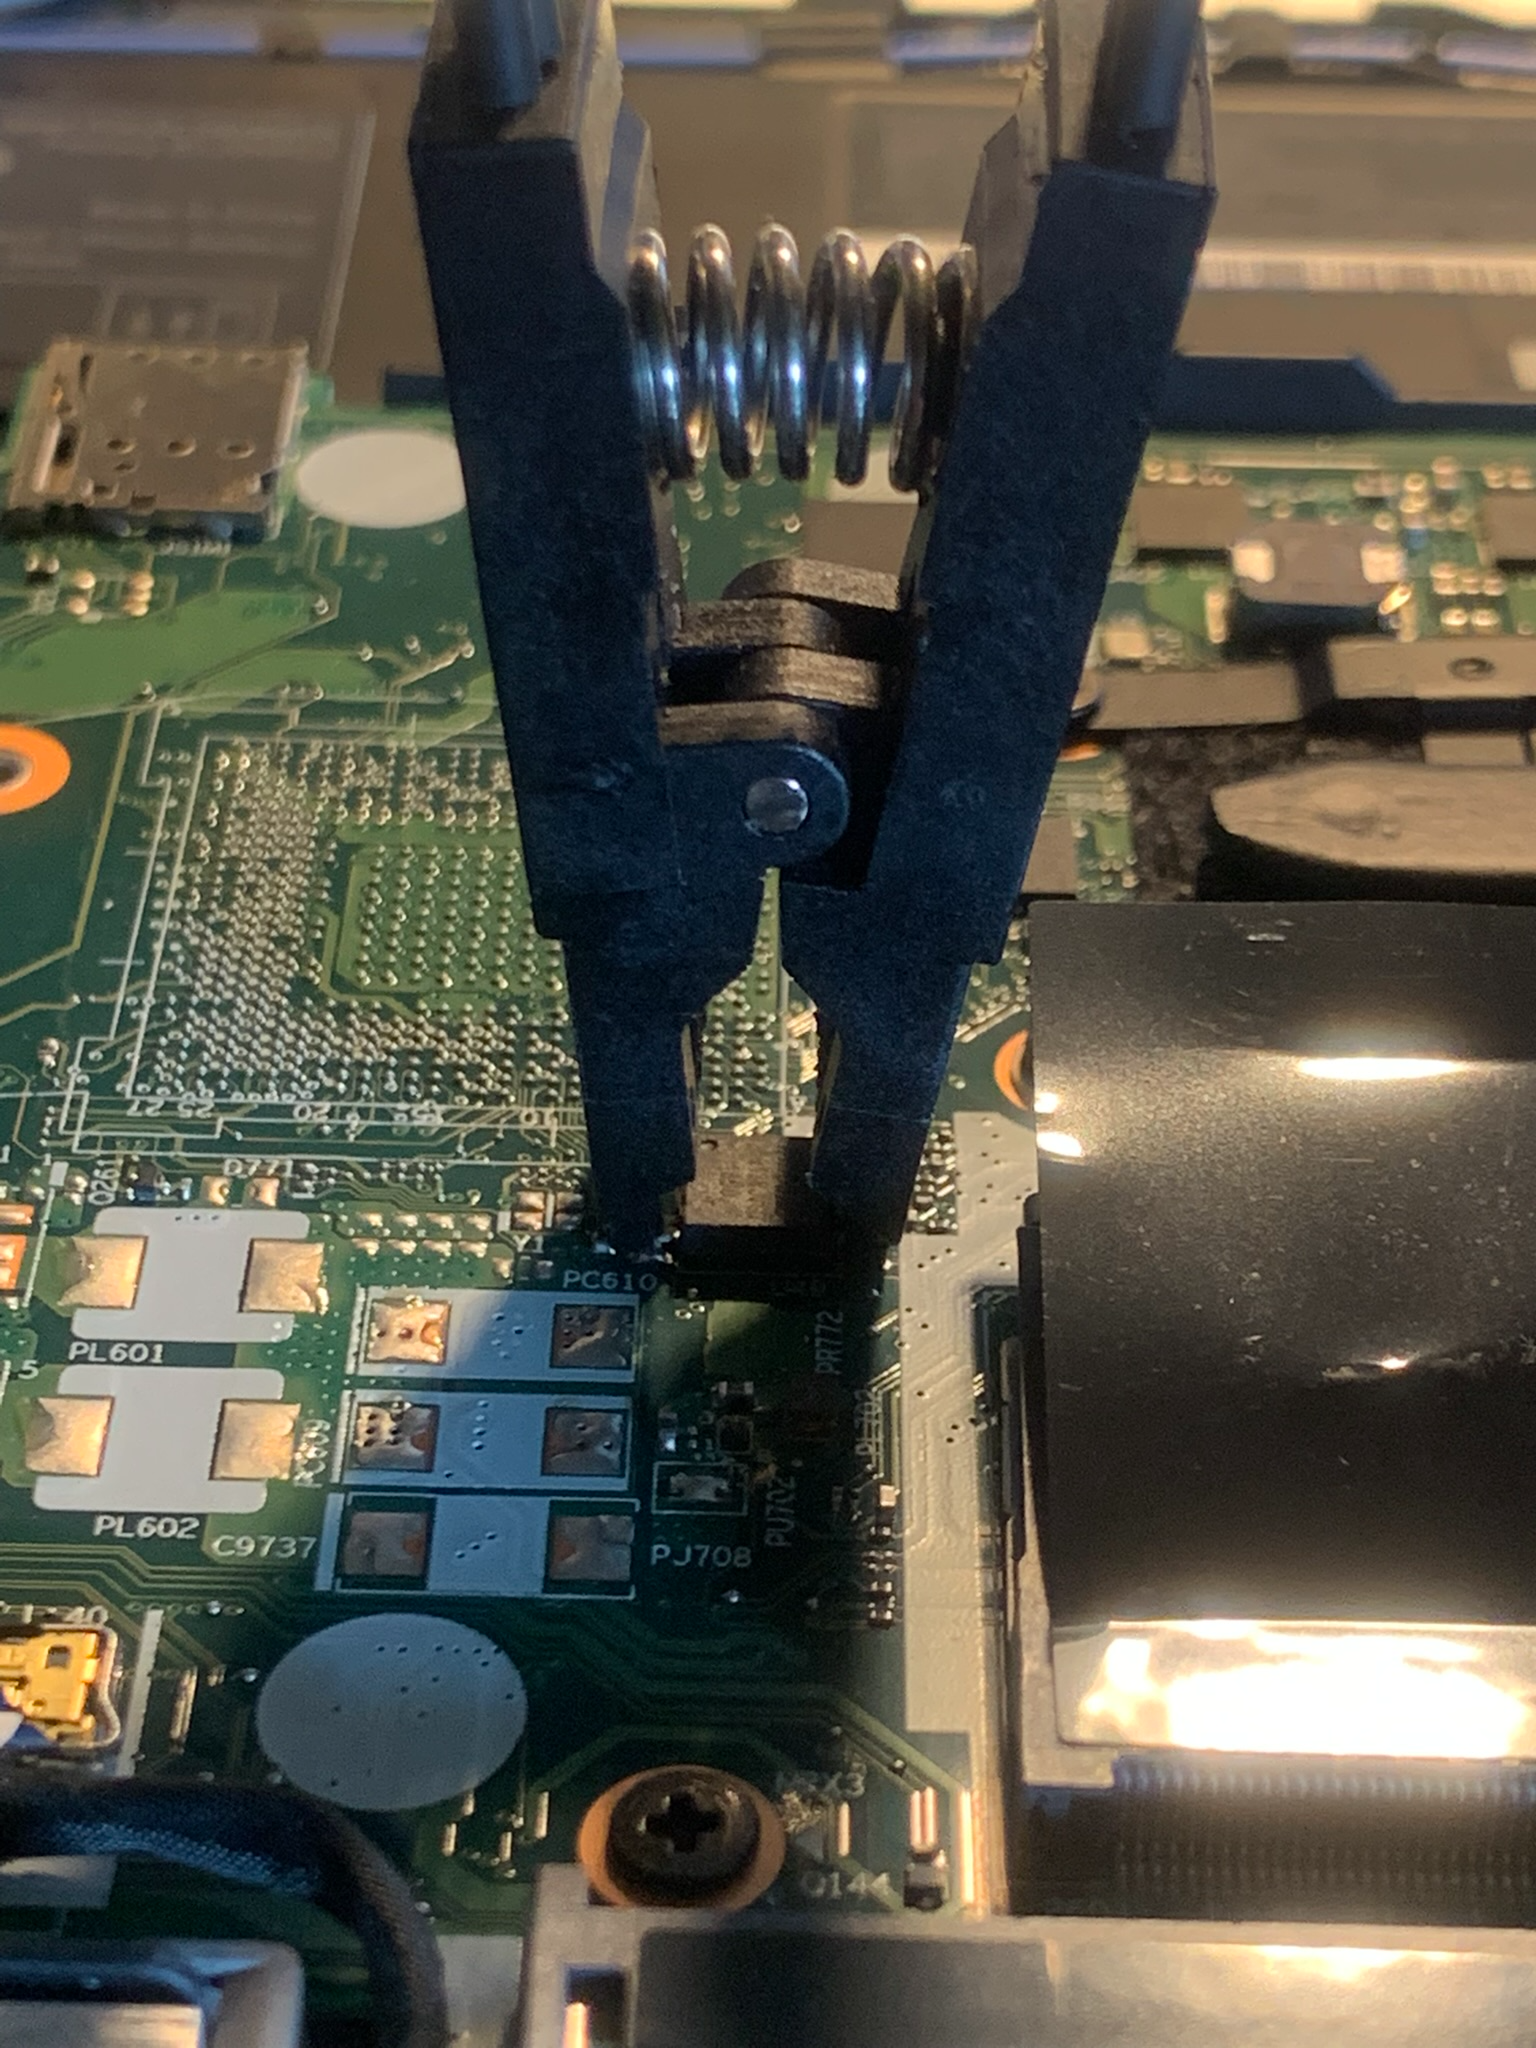
Identify the BIOS chip located next to the DDR4 SODIMM sockets. On specific hardware motherboard revisions, this package is explicitly marked as component U49, while alternative revisions may omit BIOS chip number.
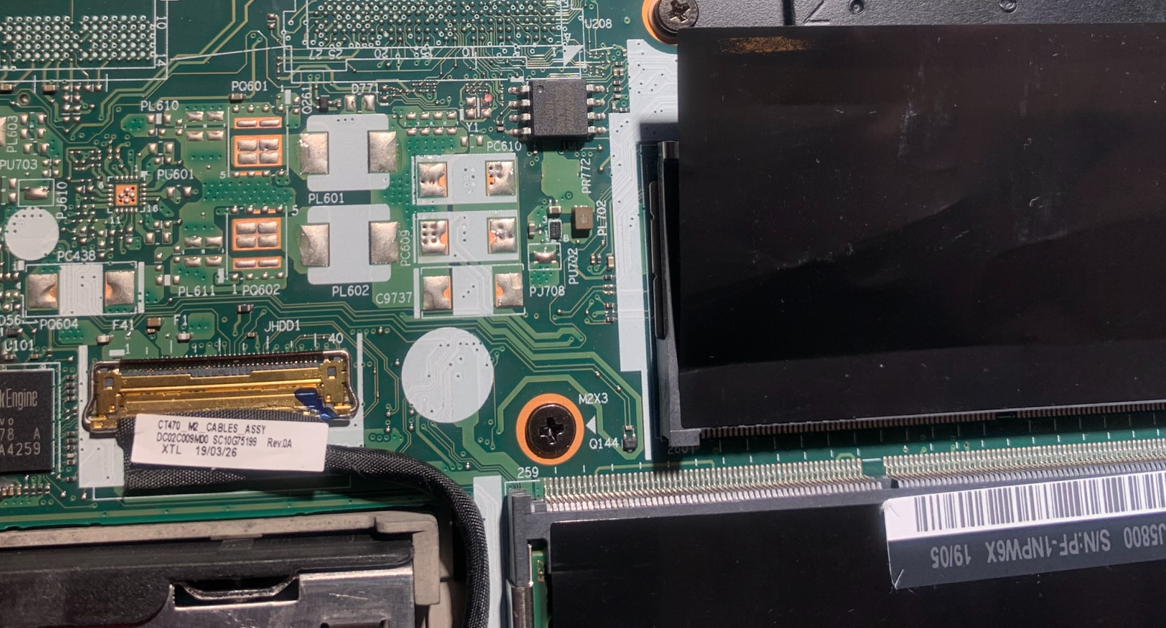
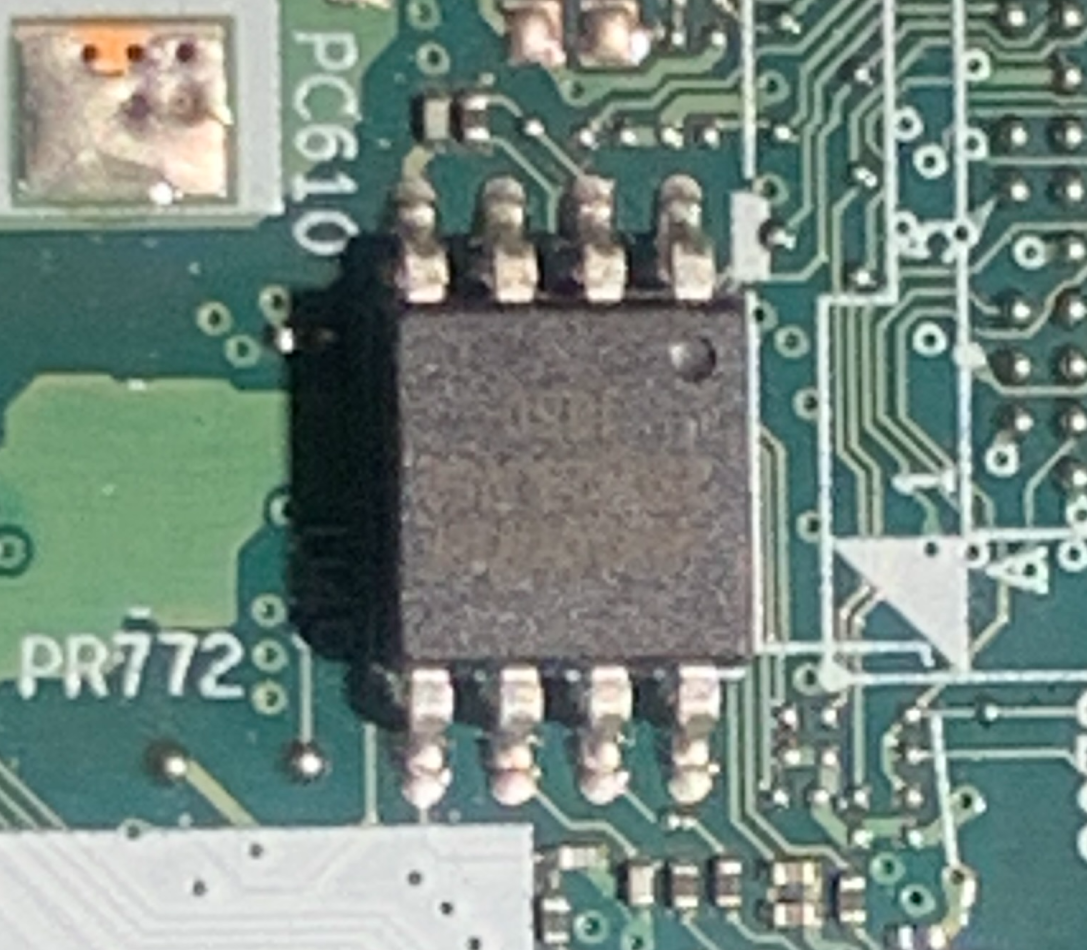
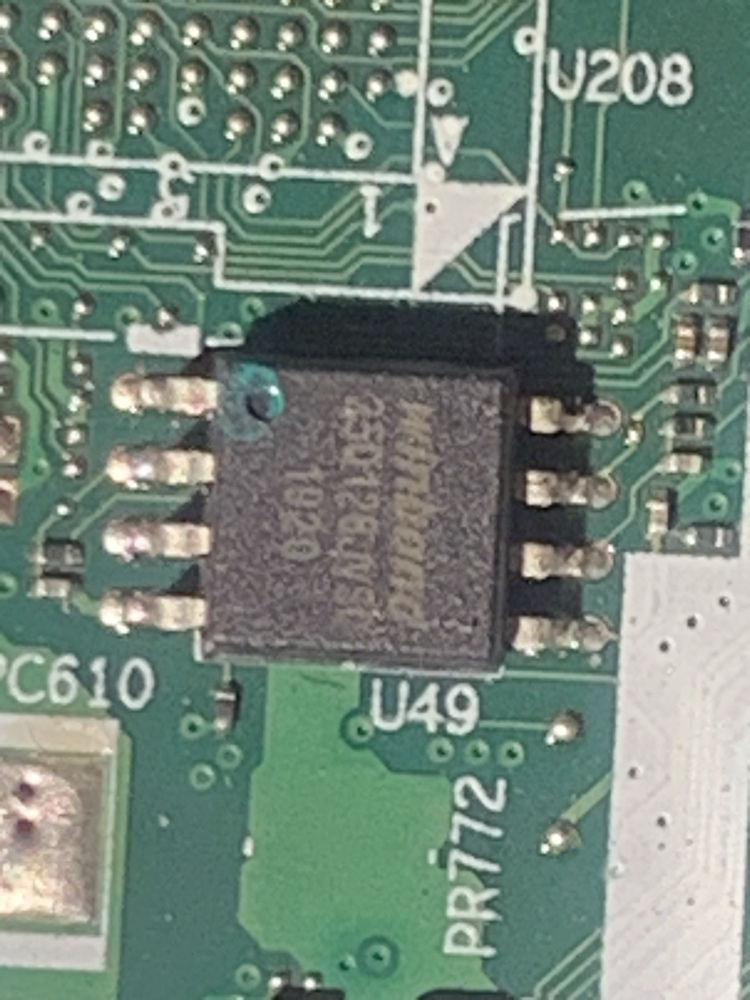
Align the Pin 1 indicator (indicated by the RED conductor line) on the ribbon cable assembly with the physical micro-dimple/dot recessed onto the primary corner of the BIOS chip.
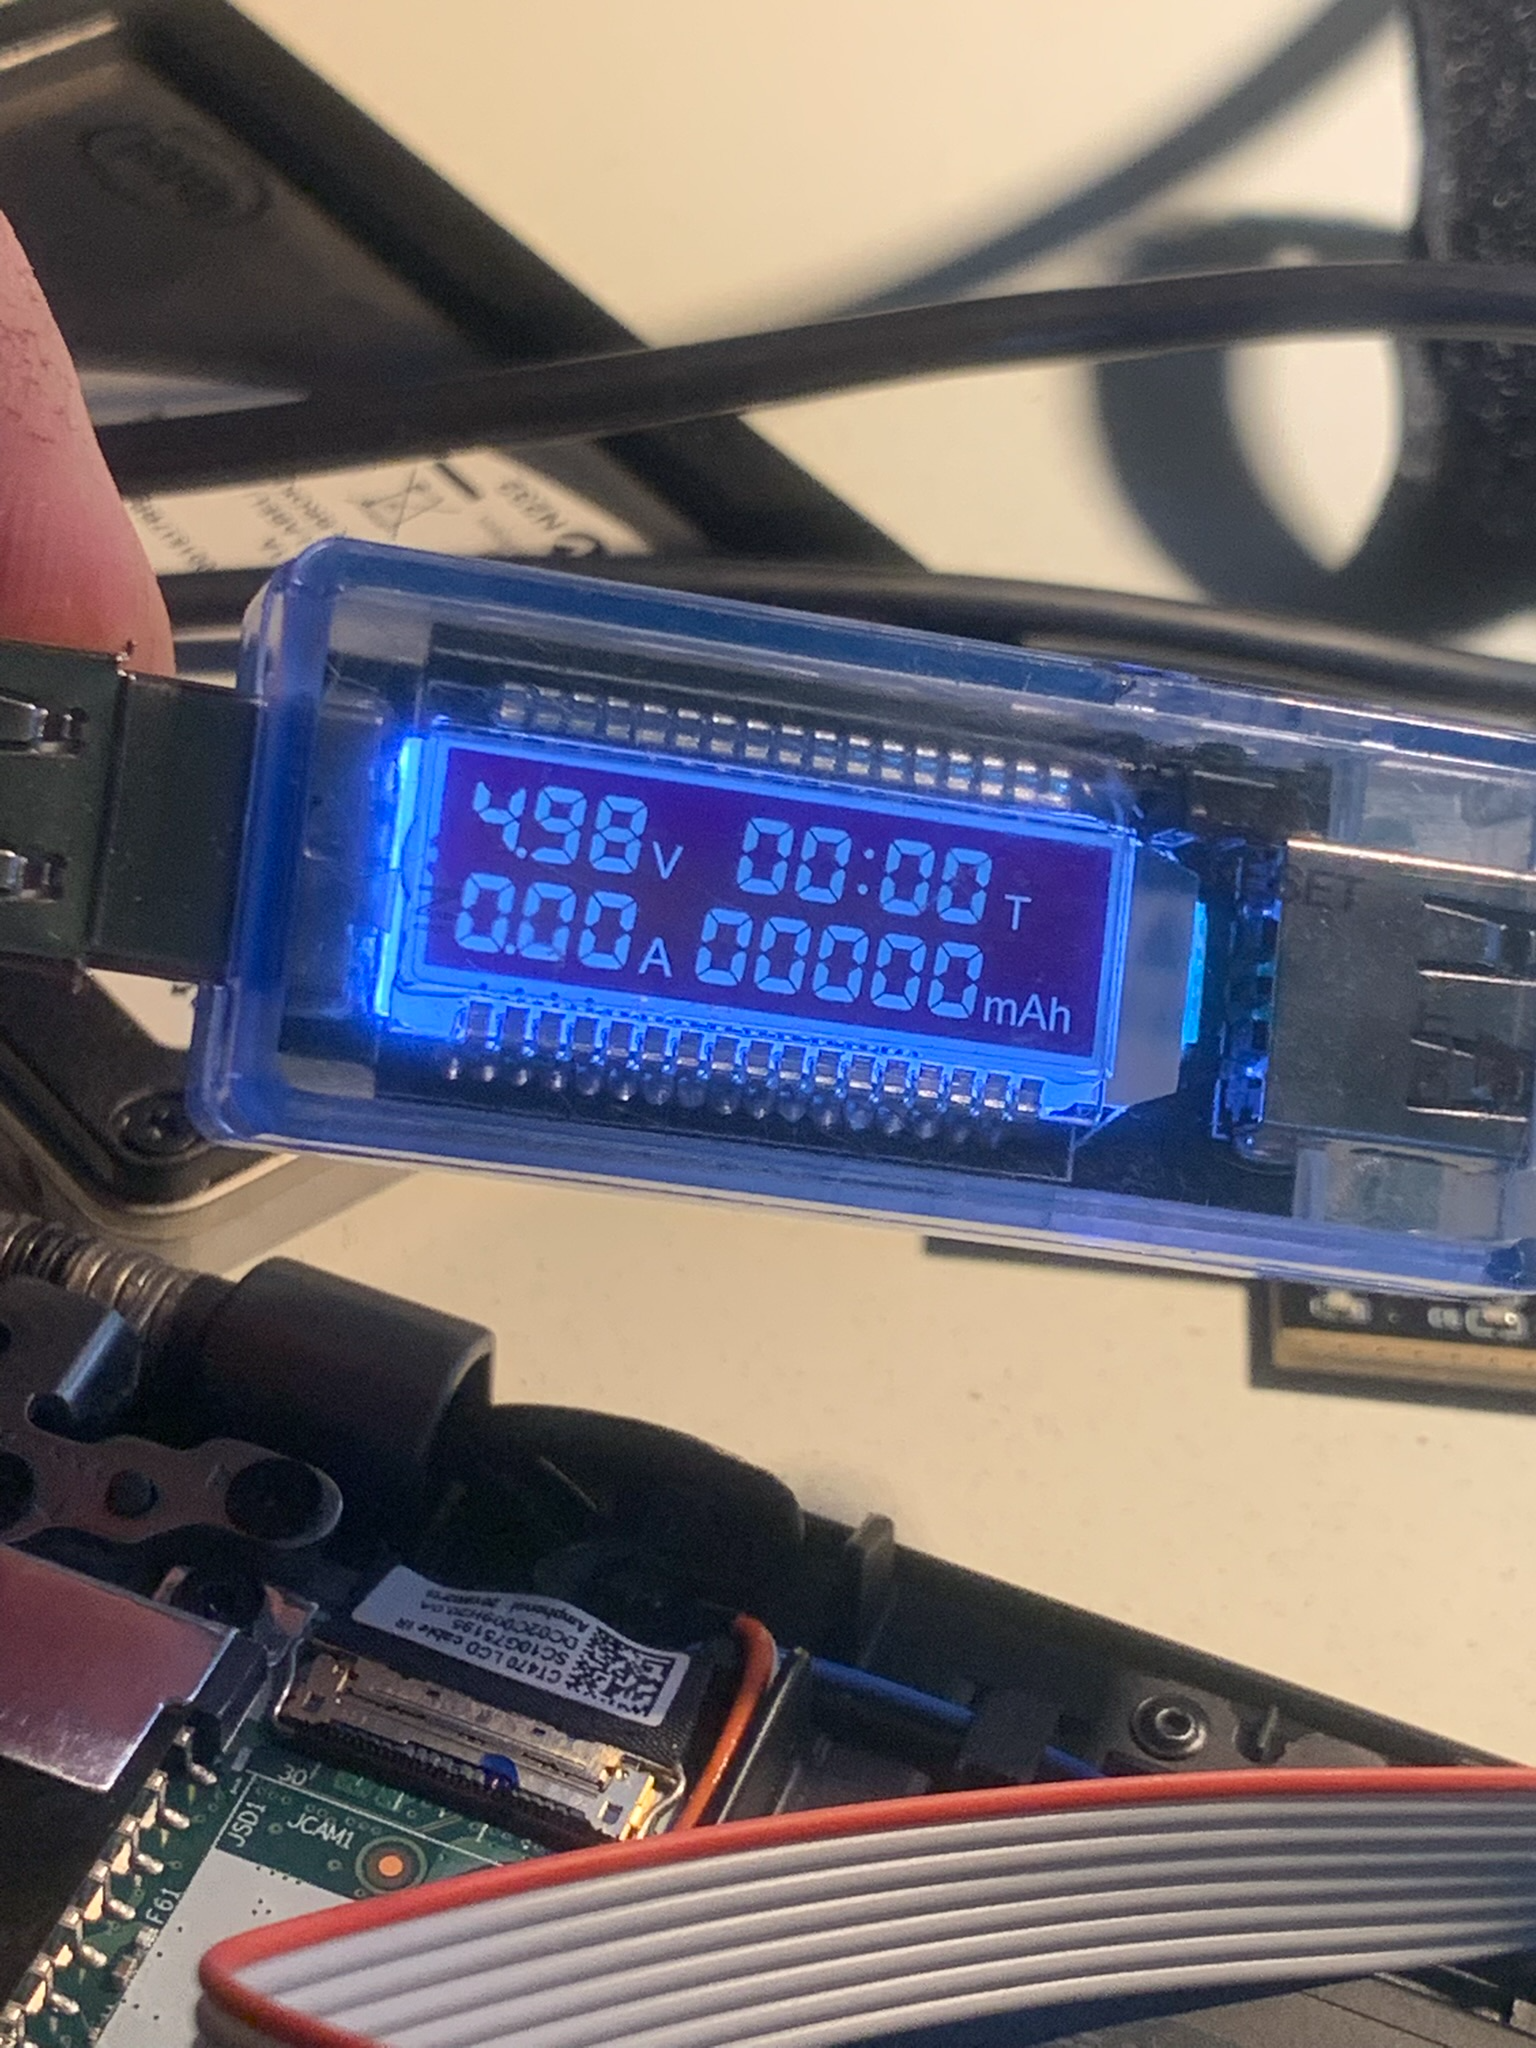
Disconnect the VOLTAGEMETER from the USB port, its not going to be needed anymore
Connect the CH341A to the WORKSTATION USB, the power LED on the CH341A will turn on (red color) . Note that this indicates active subsystem voltage, not correct connection to the BIOS yet. We will now query the host subsystem bus controller to verify basic hardware registration:
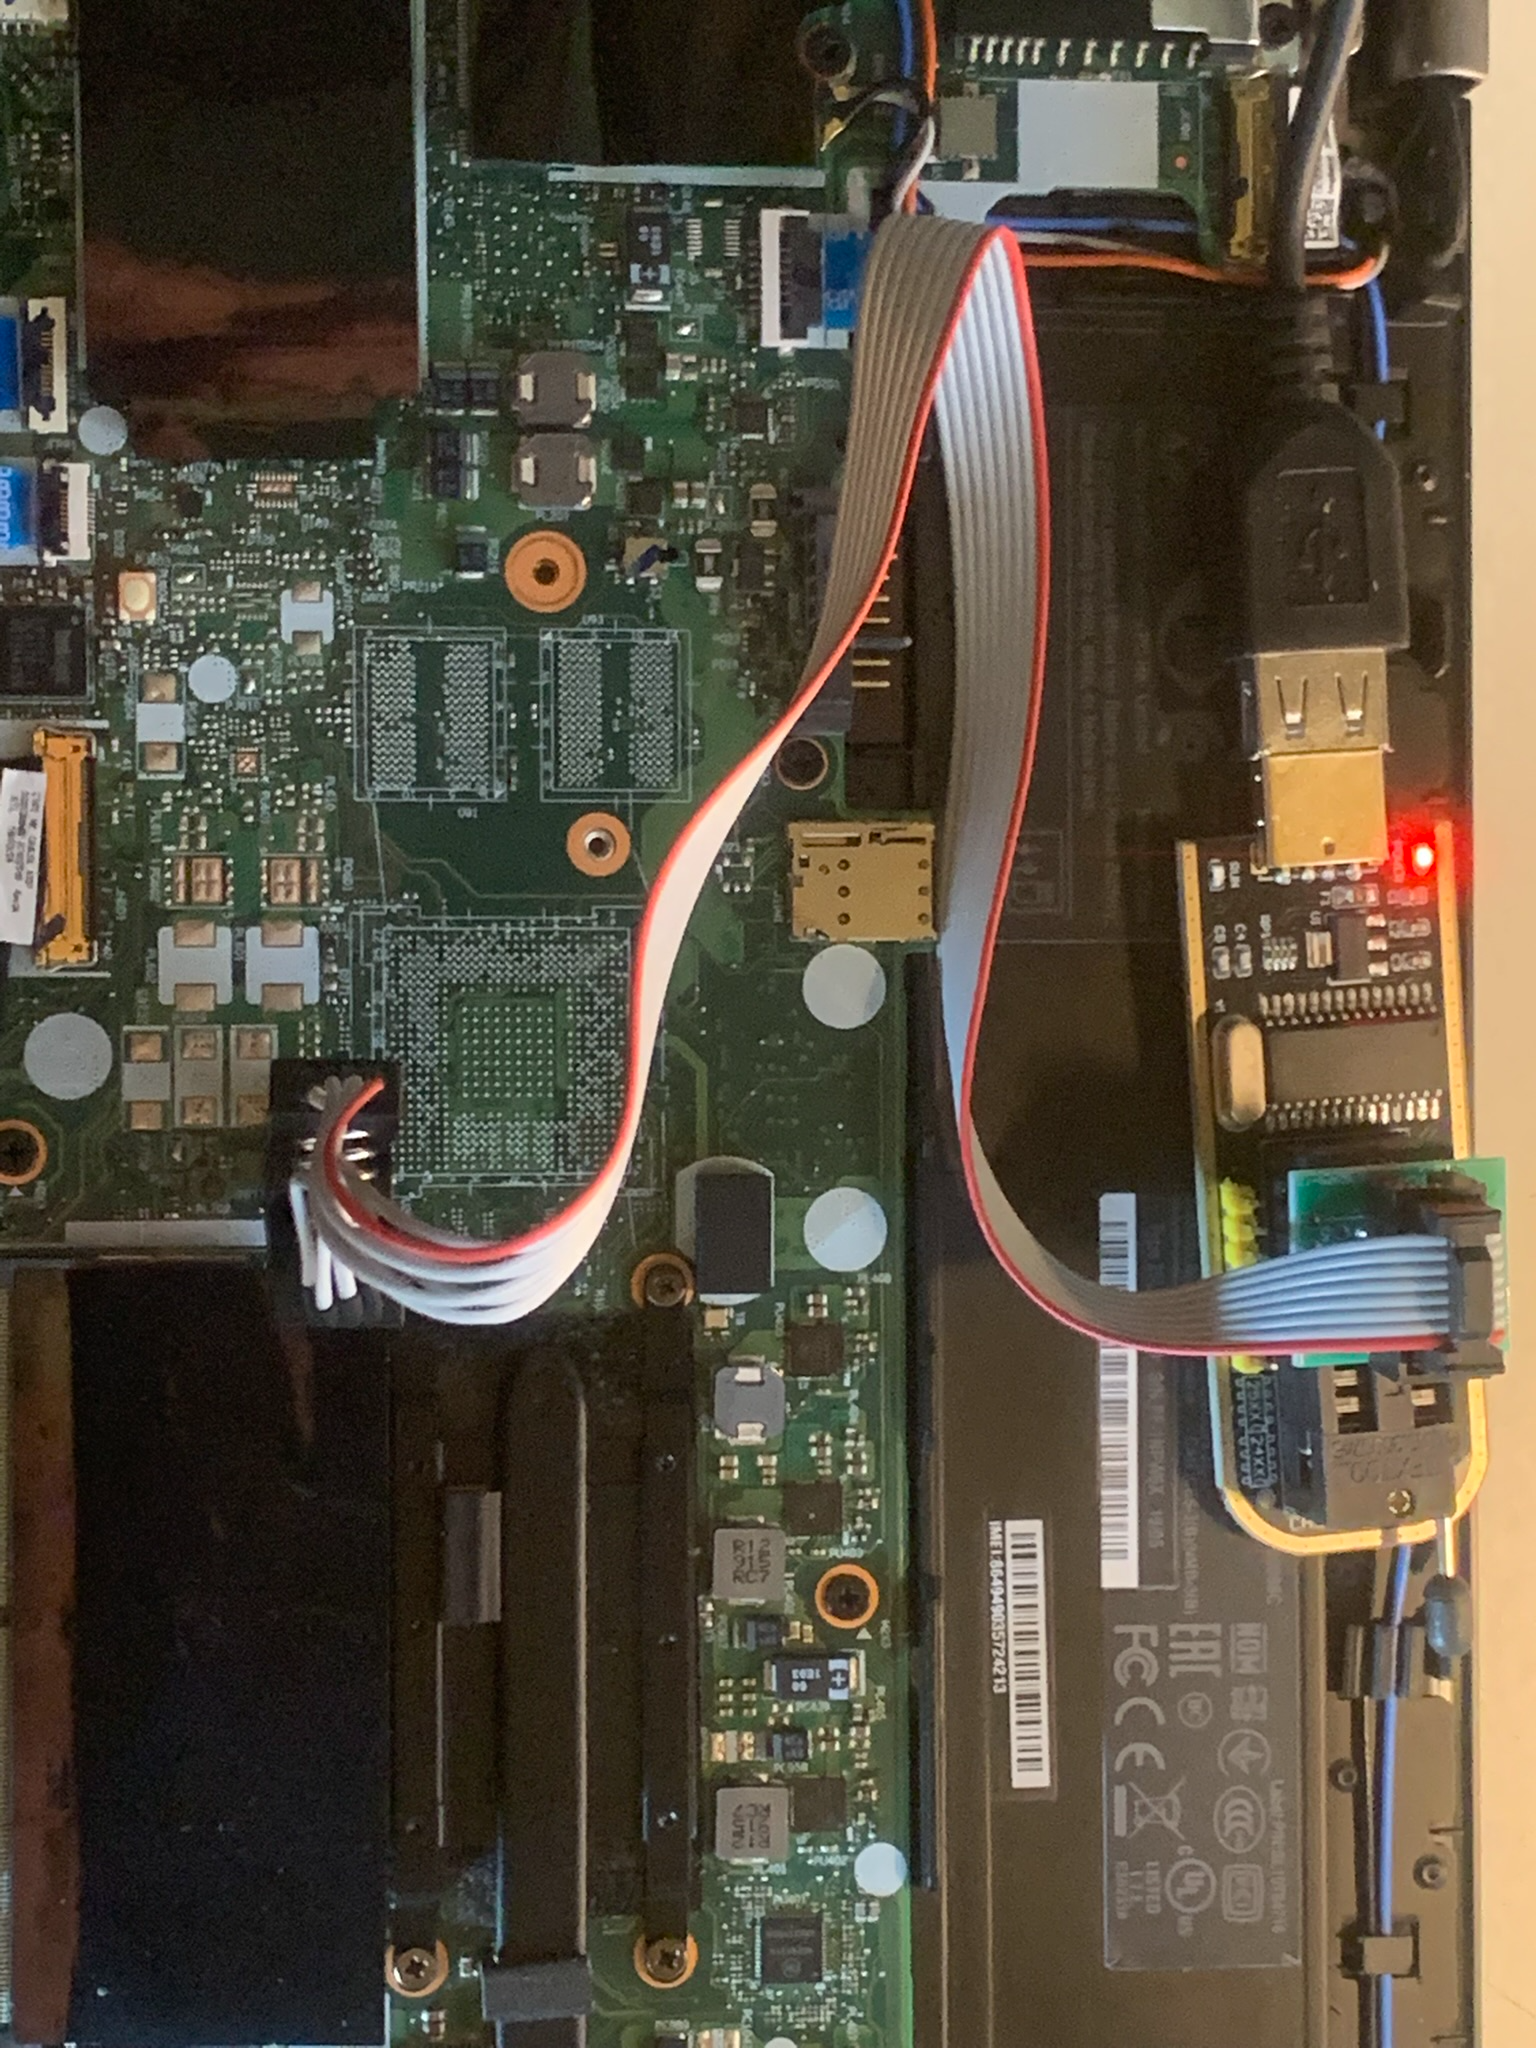
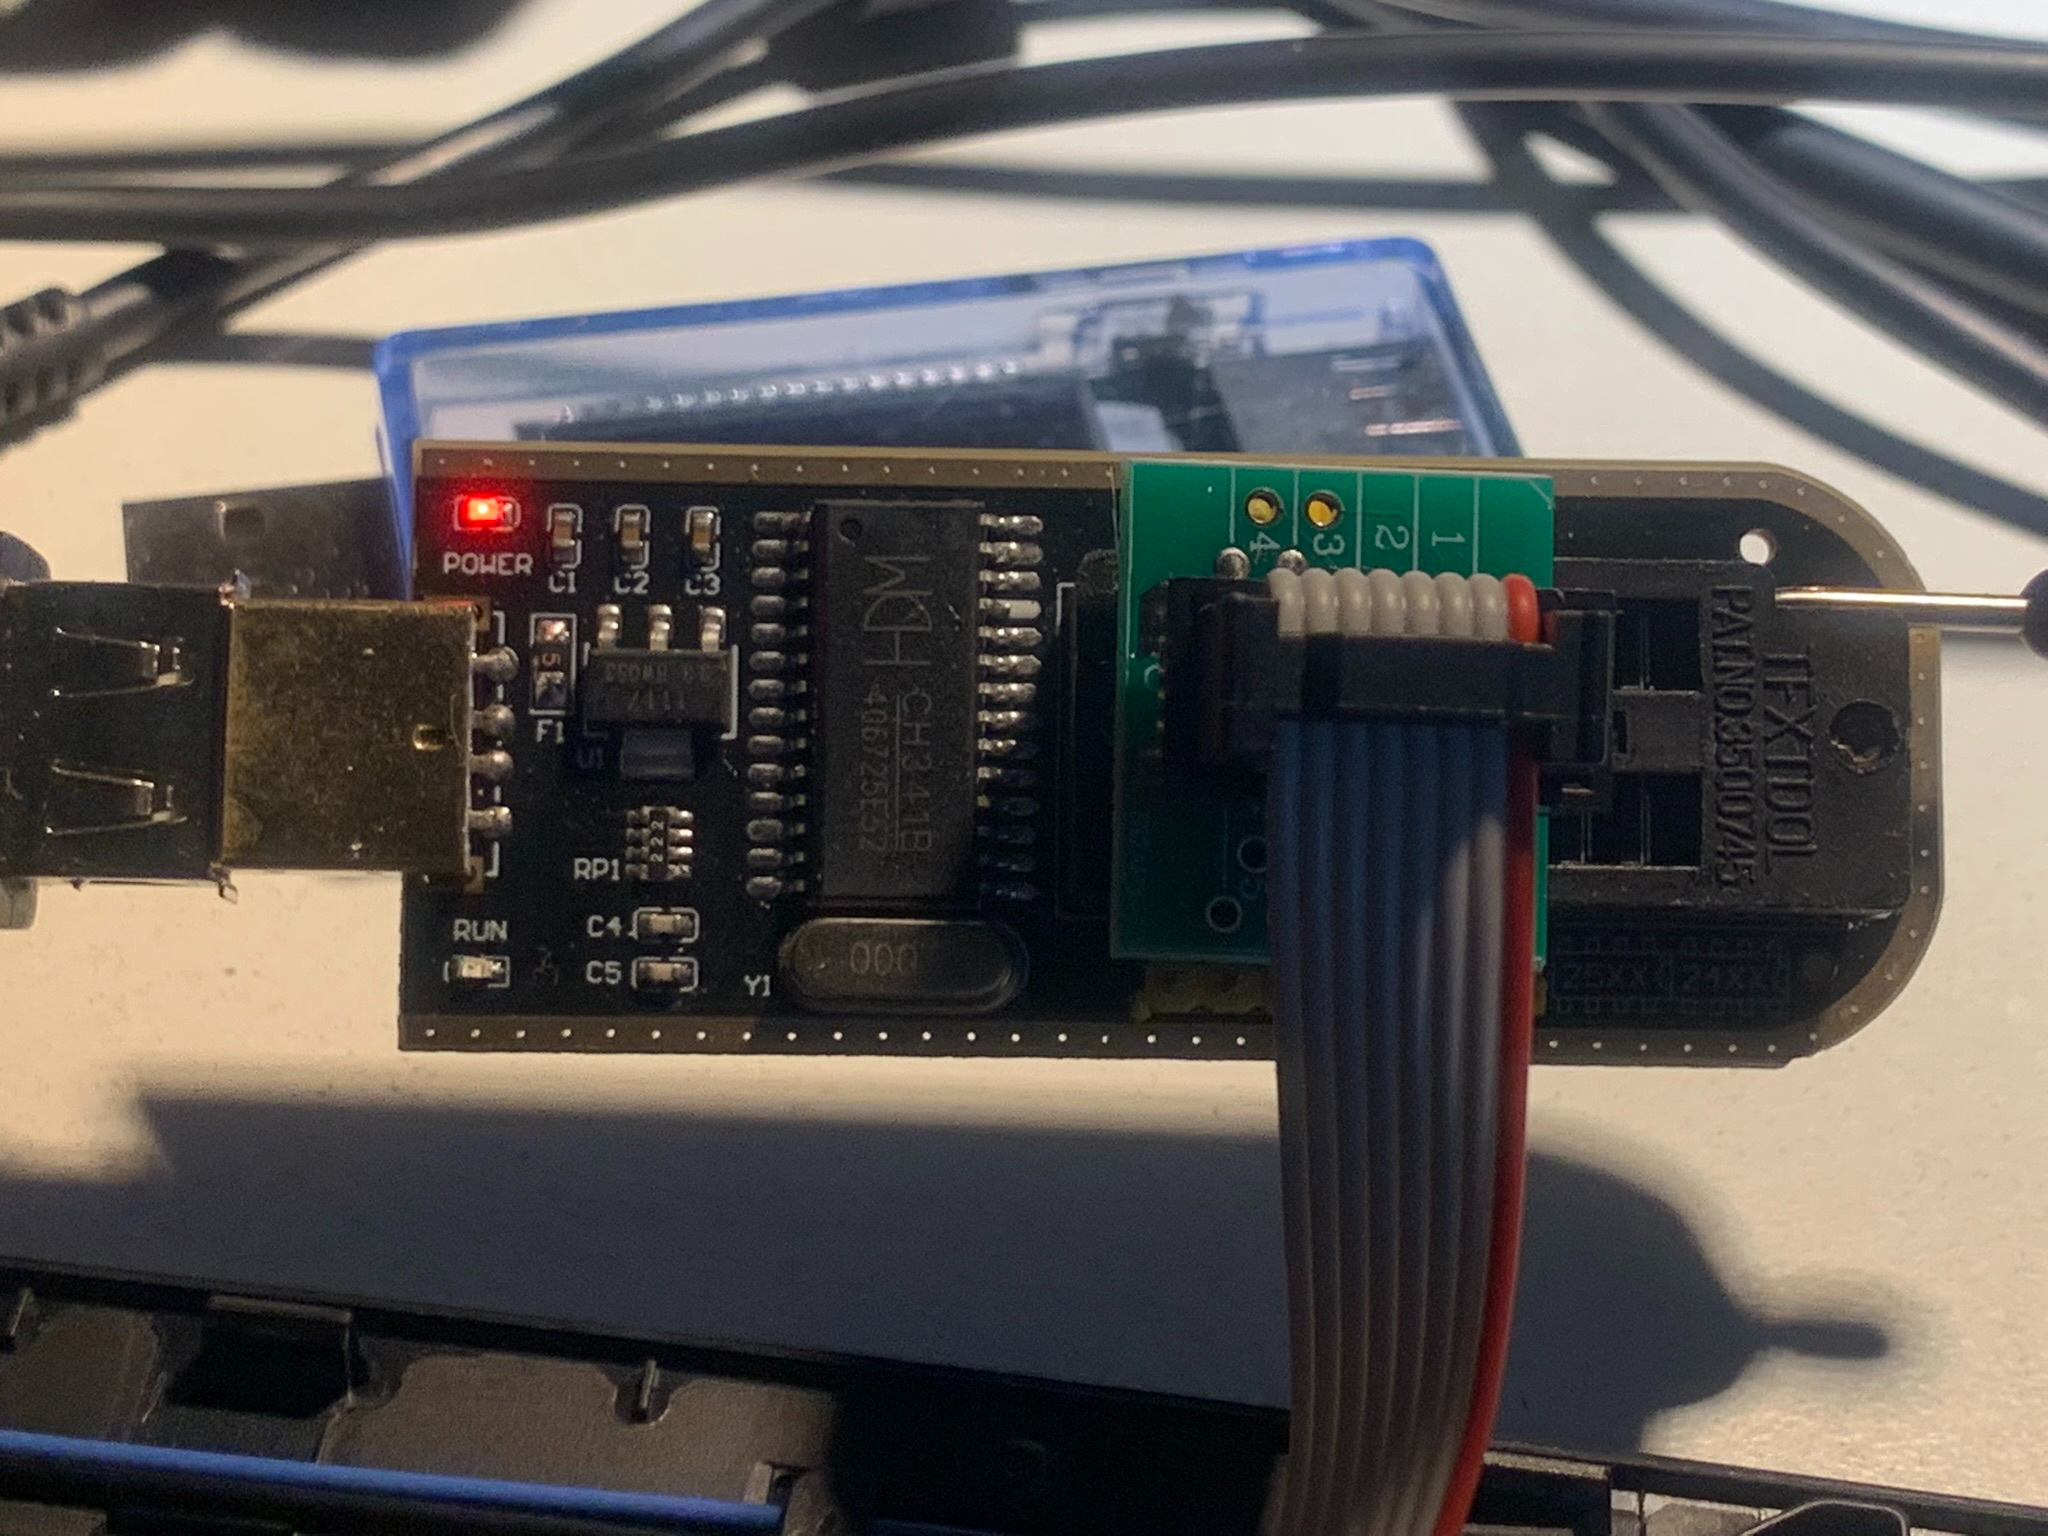
Lets check the connection from CH341A to the BIOS, we must test the connection on the WORKSTATION:
        commands to type: >
        -------------------
        cd ~/T480_i7_bios/lenovo_autopatcher
        lsusb

        ----------------
        Expected output:
        ----------------
        Bus 001 Device 001: ID 1d6b:0002 Linux Foundation 2.0 root hub
        Bus 001 Device 004: ID 1a86:5512 QinHeng Electronics CH341 in EPP/MEM/I2C mode, EPP/I2C adapter
Execute a connection check to verify that the CLIP is correctly seated on the BIOS chip
sudo flashrom -p ch341a_spi
In most cases, this will NOT work on the first run, you will have to repeat the procedure of 1/ disconnecting CH341A from USB, 2/ unplugging the CLIP from BIOS chip, 3/ carefully plugging CLIP again, and 4/ reconnect CH341A to WORKSTATION USB. You will have to do this many times. It usually takes me 20 times
The most probably output will be:
        No EEPROM/flash device found.
        Note: flashrom can never write if the flash chip isn't found automatically.
Possible output can also be :
        cb_in: error: LIBUSB_TRANSFER_TIMED_OUT
        ch341a_spi_spi_send_command: Failed to read 3 bytes
        cb_out: error: LIBUSB_TRANSFER_TIMED_OUT

        cb_in: error: LIBUSB_TRANSFER_TIMED_OUT
        ch341a_spi_spi_send_command: Failed to read 3 bytes
        cb_out: error: LIBUSB_TRANSFER_TIMED_OUT

        cb_in: error: LIBUSB_TRANSFER_TIMED_OUT
        ch341a_spi_spi_send_command: Failed to write 36 bytes
        cb_out: error: LIBUSB_TRANSFER_TIMED_OUT

        ...
        ch341a_spi_spi_send_command: Failed to write 38 bytes
        ch341a_spi_spi_send_command: failed to submit OUT transfer: LIBUSB_ERROR_NO_DEVICE
        ch341a_spi_spi_send_command: Failed to write 39 bytes
        ch341a_spi_spi_send_command: failed to submit OUT transfer: LIBUSB_ERROR_NO_DEVICE

        No EEPROM/flash device found.
sudo rmmod ch341 or pass full verbose parameters into the application engine: sudo flashrom -p ch341a_spi -V.
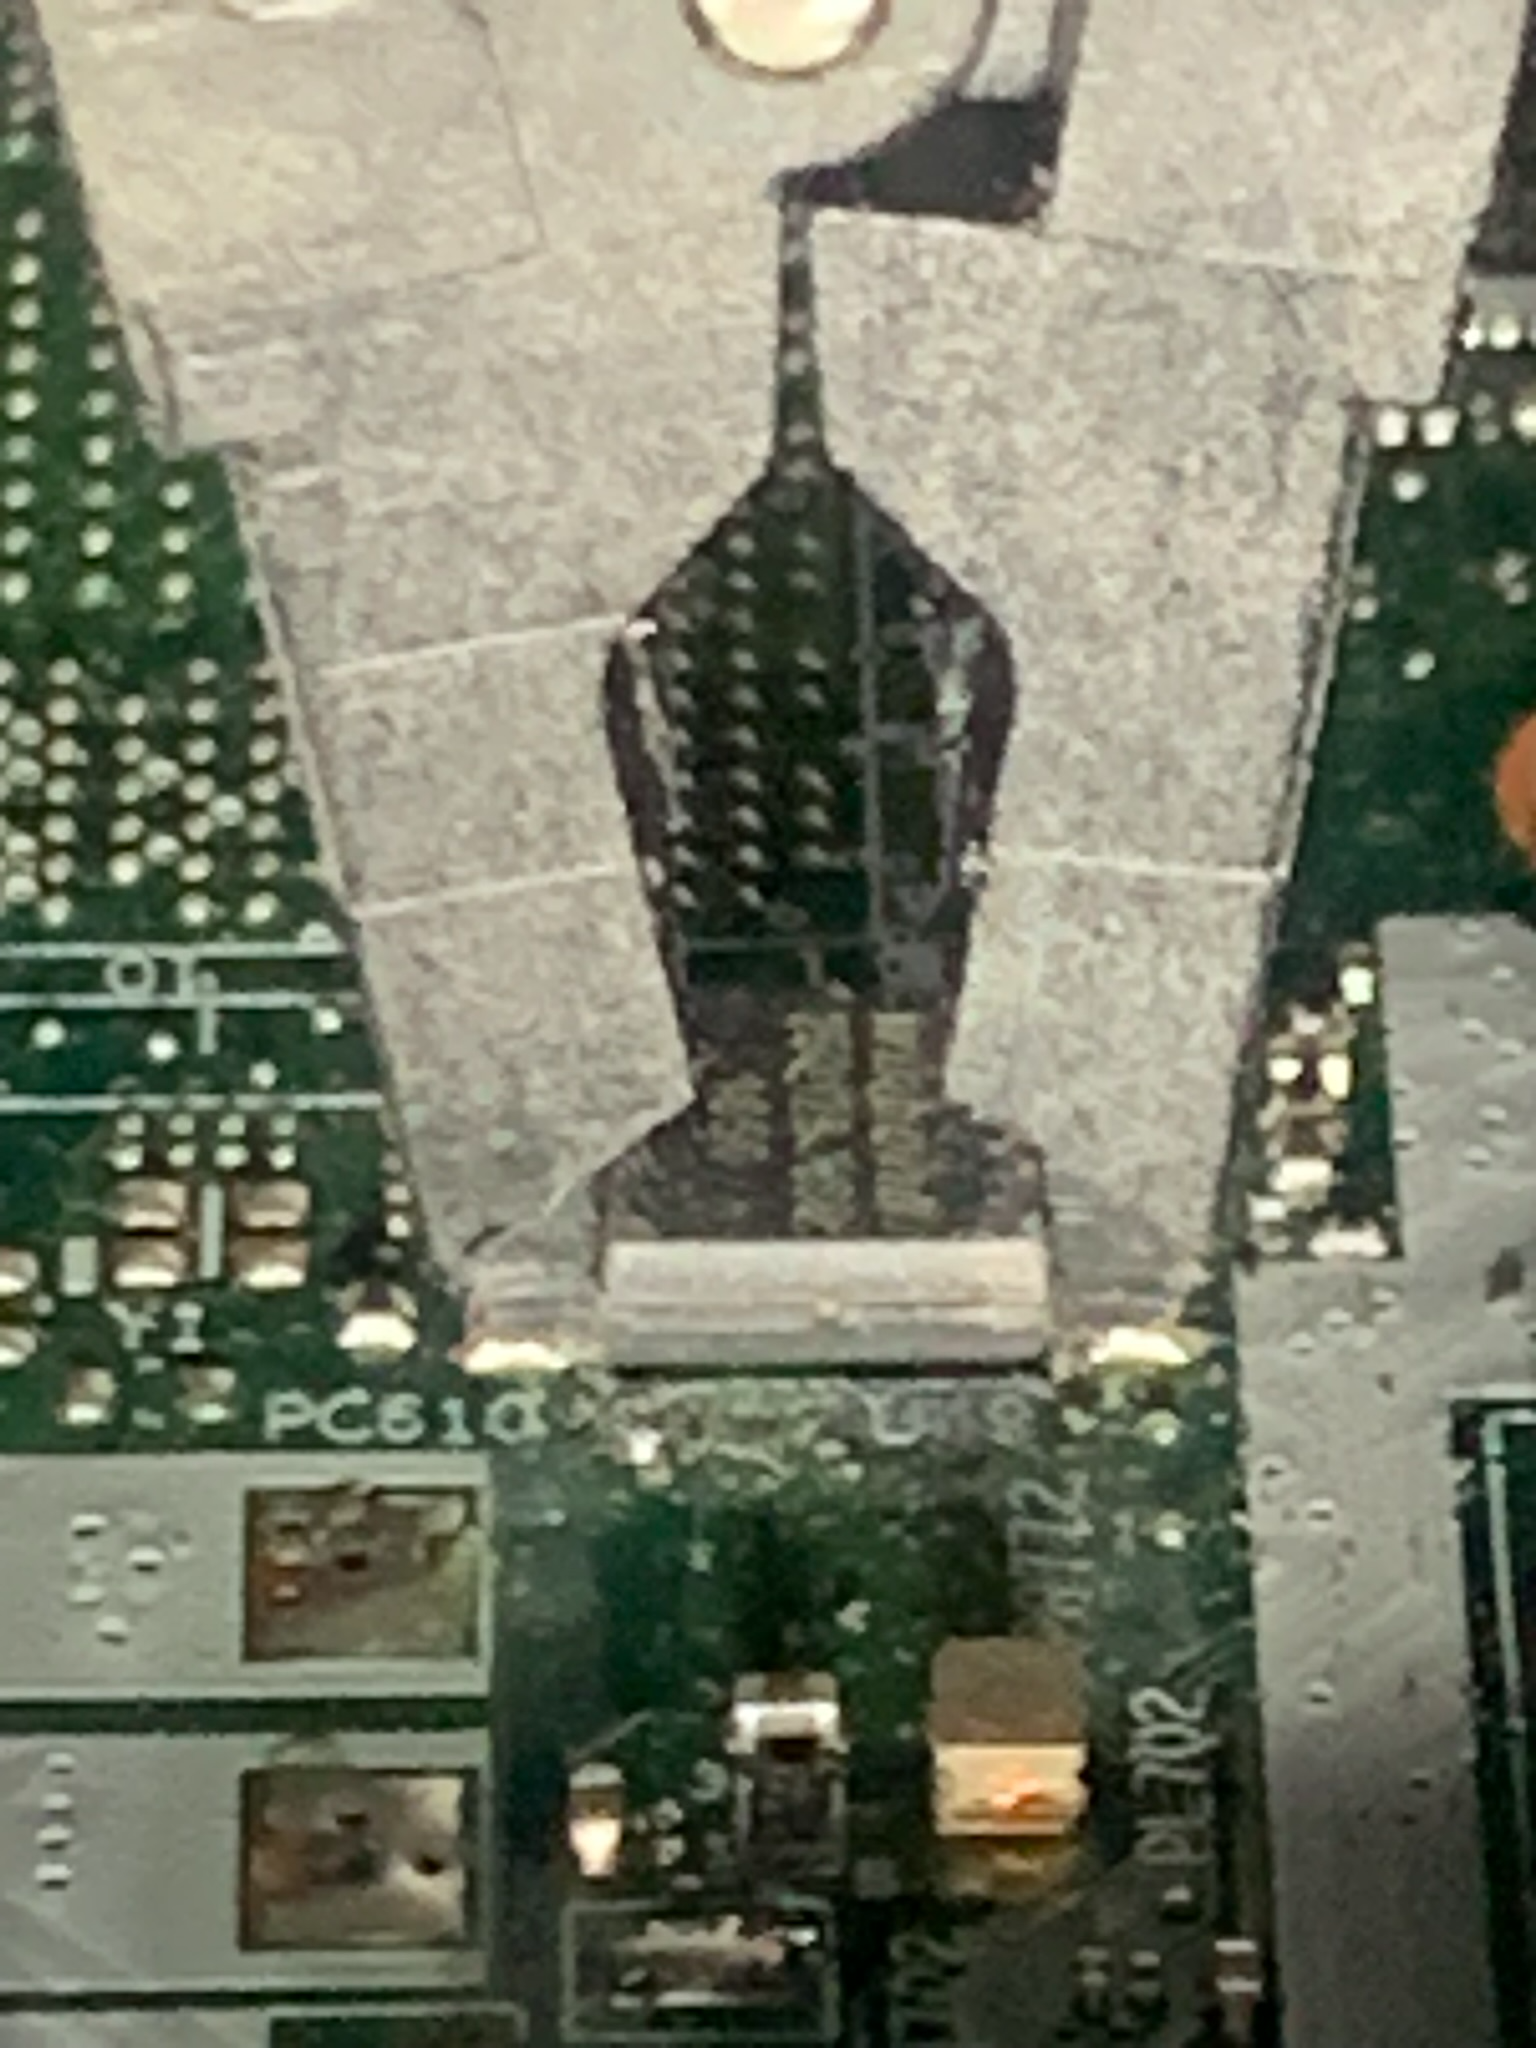
Connections is OK After many attempts (it takes me more than 20 attempts), you will receive this output
        commands to type: >
        -------------------
        sudo flashrom -p ch341a_spi

        ----------------
        Expected output:
        ----------------

        flashrom 1.4.0 on Linux 6.12.90+deb13.1-amd64 (x86_64)
        flashrom is free software, get the source code at https://flashrom.org

        Found Winbond flash chip "W25Q128.V" (16384 kB, SPI) on ch341a_spi.
        No operations were specified.
DO NOT DISCONNECT THE CLIP DURING THIS STEP
BE CAREFUL NOT TO BUMP THE CLIP WITH YOUR HAND SO THAT IT GETS DISCONNECTED
Once a stable connection is established between CH341A and BIOS, isolate the hardware from vibration (dont bump the T480 or the CLIP with your hand). Perform two sequential firmware read passes into distinct BIOS backup files, then analyze their cryptographic hash values to guarantee error-free bitstream extraction:
We are going to do 2 backups and compare them simnoply because without the backup you might brick your T480
        commands to type: >
        -------------------
        cd ~/T480_i7_bios/lenovo_autopatcher
        sudo flashrom -p ch341a_spi -r T480_i7_file1.bin
        sudo flashrom -p ch341a_spi -r T480_i7_file2.bin

        ls -lh T480_i7_file1.bin T480_i7_file2.bin

        ----------------
        Expected output:
        ----------------
        -rw-r--r-- 1 root root 16M Jun  1 16:07 T480_i7_file1.bin
        -rw-r--r-- 1 root root 16M Jun  1 16:09 T480_i7_file2.bin


        commands to type: >
        -------------------
        md5sum T480_i7_file1.bin T480_i7_file2.bin

        ----------------
        Expected output:
        ----------------
        4af80c35b618687cafe2e7228e256640  T480_i7_file1.bin
        4af80c35b618687cafe2e7228e256640  T480_i7_file2.bin
        commands to type: >
        -------------------
        cd ~/T480_i7_bios/lenovo_autopatcher
        cp T480_i7_file1.bin T480_i7_backup.bin
DO NOT DISCONNECT THE CLIP DURING THIS STEP
BE CAREFUL NOT TO BUMP THE CLIP WITH YOUR HAND SO THAT IT GETS DISCONNECTED
The autopatch script will output structural validation logs tracing the driver injection status:
        commands to type: >
        -------------------
        cd ~/T480_i7_bios/lenovo_autopatcher
        python3 patch/autopatch.py T480_i7_backup.bin


        ----------------
        Expected output:
        ----------------

        Using UEFIReplace to inject 2 DXE drivers...
        [1/2] BootOption (GUID e0746c42-d3f9-4f8b-b211-1410957b9ff5)
        [2/2] LenovoTranslateService (GUID 826bcf56-bac4-43f4-8ea1-8cdf0a121abd)

        Looking for volumes to patch...
        [1/1] NVRAM_EfiSystemNvDataFvGuid (checksum 2609h):
        Found volume at offset 800000h (checksum 2609h)
        Replacing volume.

        Done.
        PATCH FILE: T480_i7_backup_PATCHED.bin
DO NOT DISCONNECT THE CLIP DURING THIS STEP
BE CAREFUL NOT TO BUMP THE CLIP WITH YOUR HAND SO THAT IT GETS DISCONNECTED
We should have all the files necessary now to flash the T480
        commands to type: >
        -------------------
        cd ~/T480_i7_bios/lenovo_autopatcher$
        ls -1

        ----------------
        Expected output:
        ----------------
        autopatch
        autopatch.cmd
        patch
        T480_i7_backup.bin
        T480_i7_backup_PATCHED.bin
        T480_i7_file1.bin
        T480_i7_file2.bin
        tools
To ensure total data write synchronization and overwrite secure sectors cleanly, issue a hardware block erase sequence (-E) to the memory module, followed immediately by the flash write operation:
        commands to type: >
        -------------------
        sudo flashrom -p ch341a_spi -E

        ----------------
        Expected output:
        ----------------
        flashrom 1.4.0 on Linux 6.12.90+deb13.1-amd64 (x86_64)
        flashrom is free software, get the source code at https://flashrom.org
        Found Winbond flash chip "W25Q128.V" (16384 kB, SPI) on ch341a_spi.
        Erase/write done from 0 to ffffff

        commands to type: >
        -------------------
        sudo flashrom -p ch341a_spi -w ~/T480_i7_bios/lenovo_autopatcher/T480_i7_backup_PATCHED.bin

        ----------------
        Expected output:
        ----------------
        flashrom 1.4.0 on Linux 6.12.90+deb13.1-amd64 (x86_64)
        flashrom is free software, get the source code at https://flashrom.org
        Found Winbond flash chip "W25Q128.V" (16384 kB, SPI) on ch341a_spi.
        Reading old flash chip contents... done.
        Erase/write done from 0 to ffffff
        Verifying flash... VERIFIED.
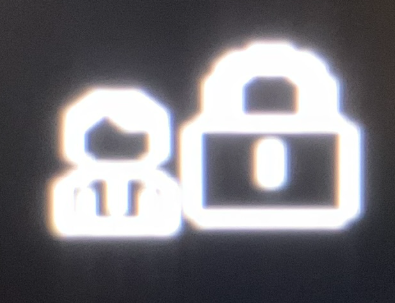
1234) and press Enter.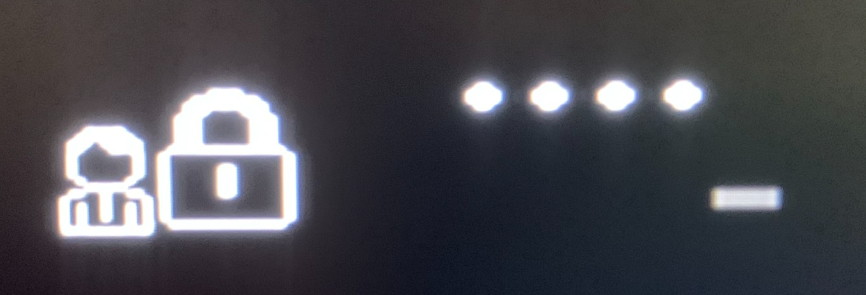
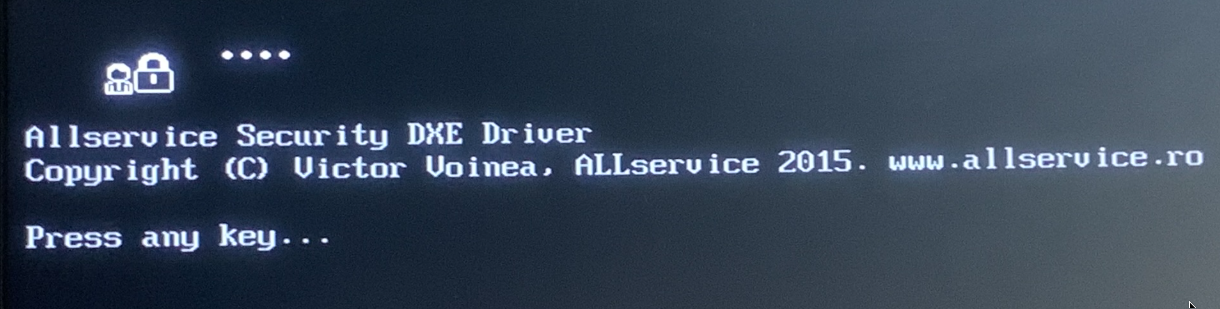
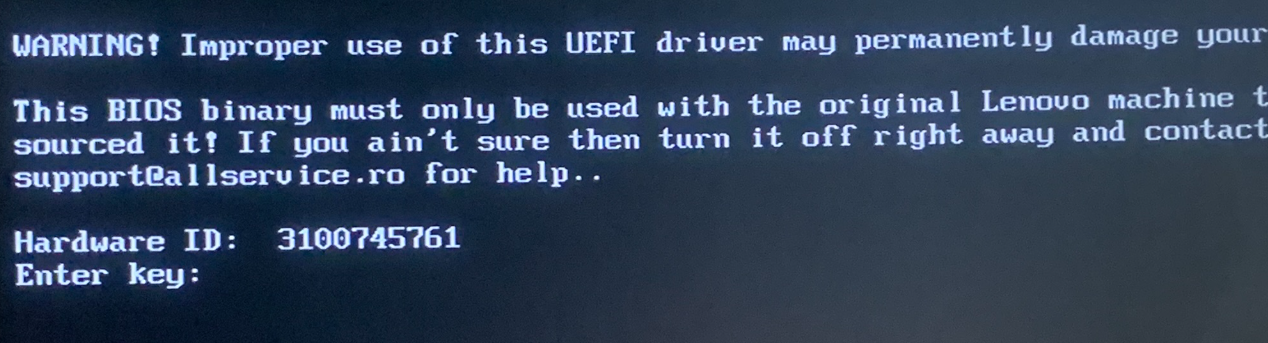
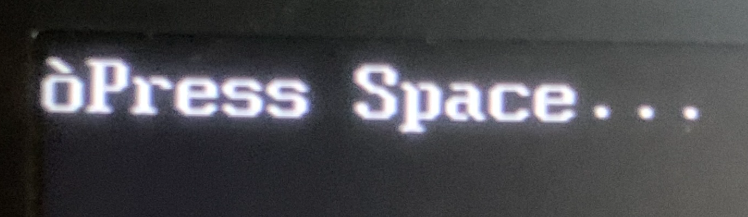
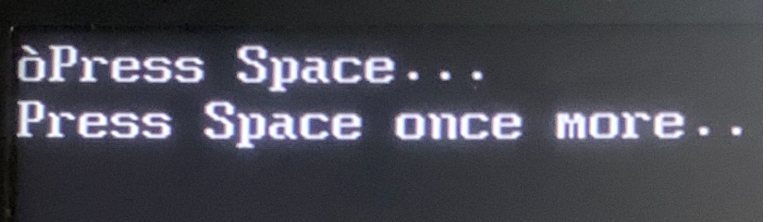
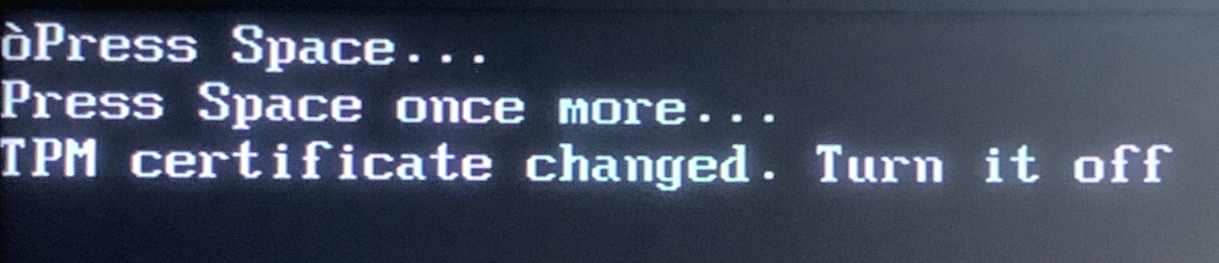
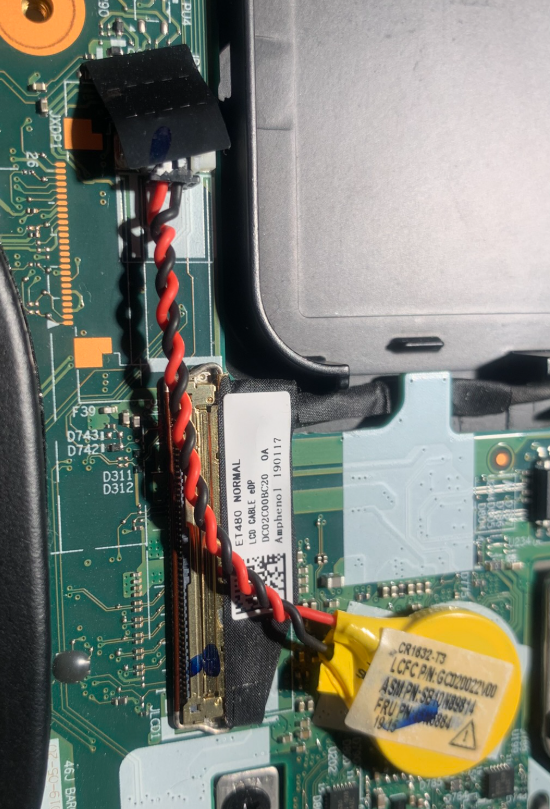
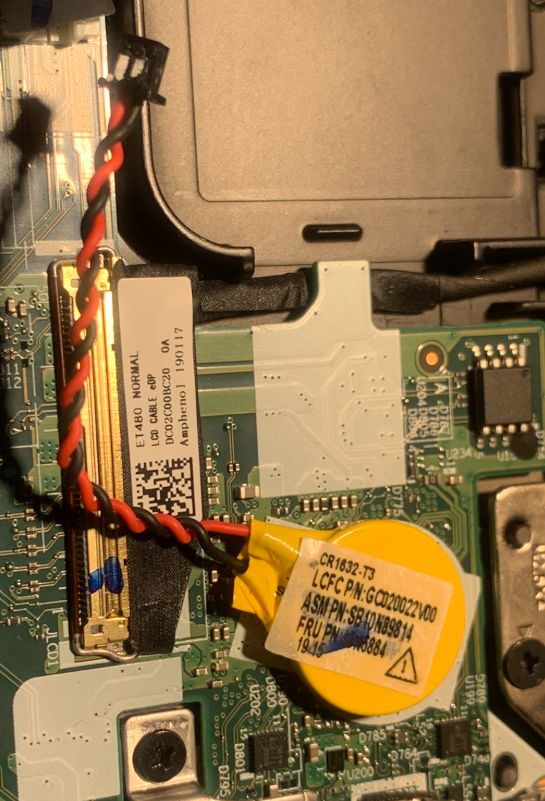
Turn the laptop over again with its internals facing up, reconnect the CLIP to BIOS, check logic connections with a connection probe command, and rewrite your original, clean factory firmware backup file:
Here again this will take many attempts, you will have to disconnect the CH341A from USB, unplug the CLIP from BIOS, carefully plug again, and reconnect CH341A to USB until you get a stable connection again. Remember that you must disconnect the CH341A programmer from USB, then disconnect the CLIP, then reconnect the CLIP, and then reconnect CH341A to USB. Never connect/disconnect CLIP from BIOS while CH341A is connected to USB power.
        commands to type: >
        -------------------
        sudo flashrom -p ch341a_spi -E
        sudo flashrom -p ch341a_spi -w ~/T480_i7_bios/lenovo_autopatcher/T480_i7_backup.bin

        ----------------
        Expected output:
        ----------------
        Found Winbond flash chip "W25Q128.V" (16384 kB, SPI) on ch341a_spi.
        Reading old flash chip contents... done.
        Erase/write done from 0 to ffffff
        Verifying flash... VERIFIED.
Disconnect the CH341A from WORKSTATION USB, disconnect the CLIP from BIOS
plug in the CMOS battery
Turn the laptop over and connect USBC power
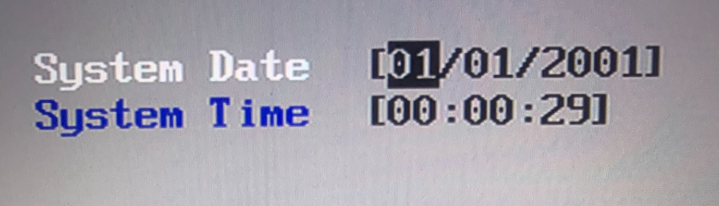
Upon initial system boot, the T480 will report minor temporary hardware error sequences like CMOS Time is not set due to the total power off phase (without CMOS battery). Press F1 to enter the main configuration platform. The restriction bits have been successfully cleared, giving you full administrative control over your ThinkPad T480 environment!
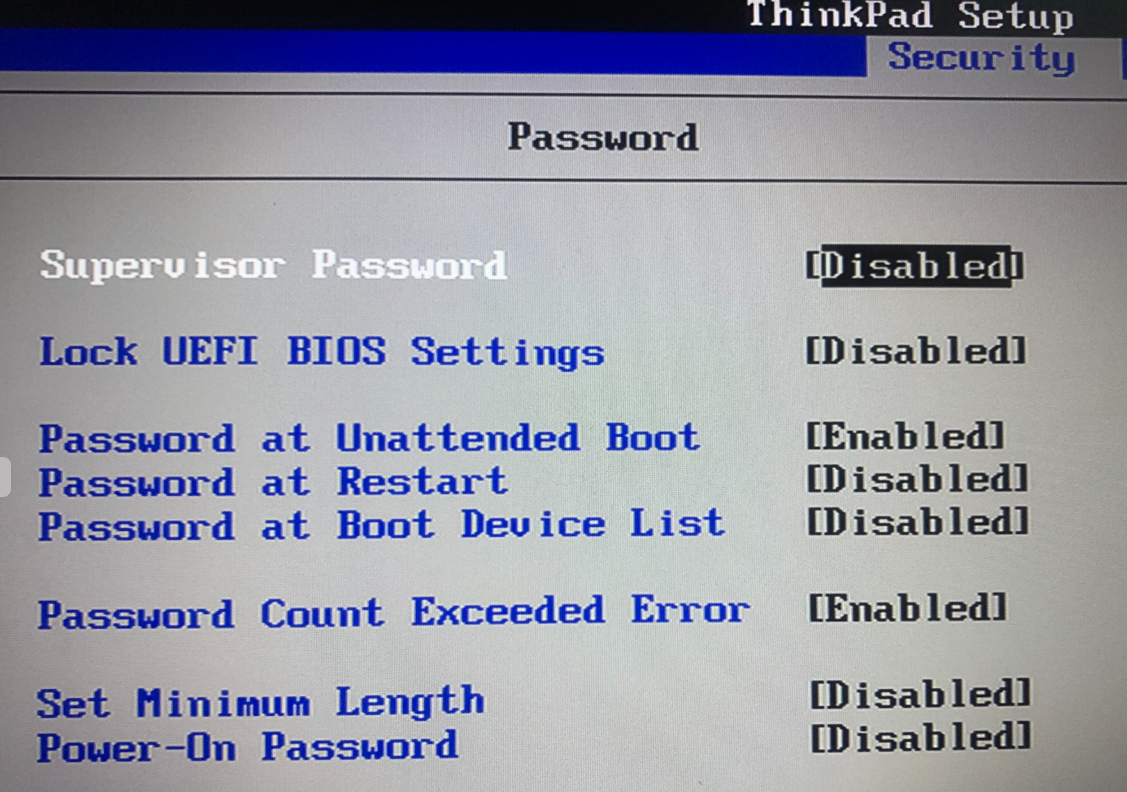
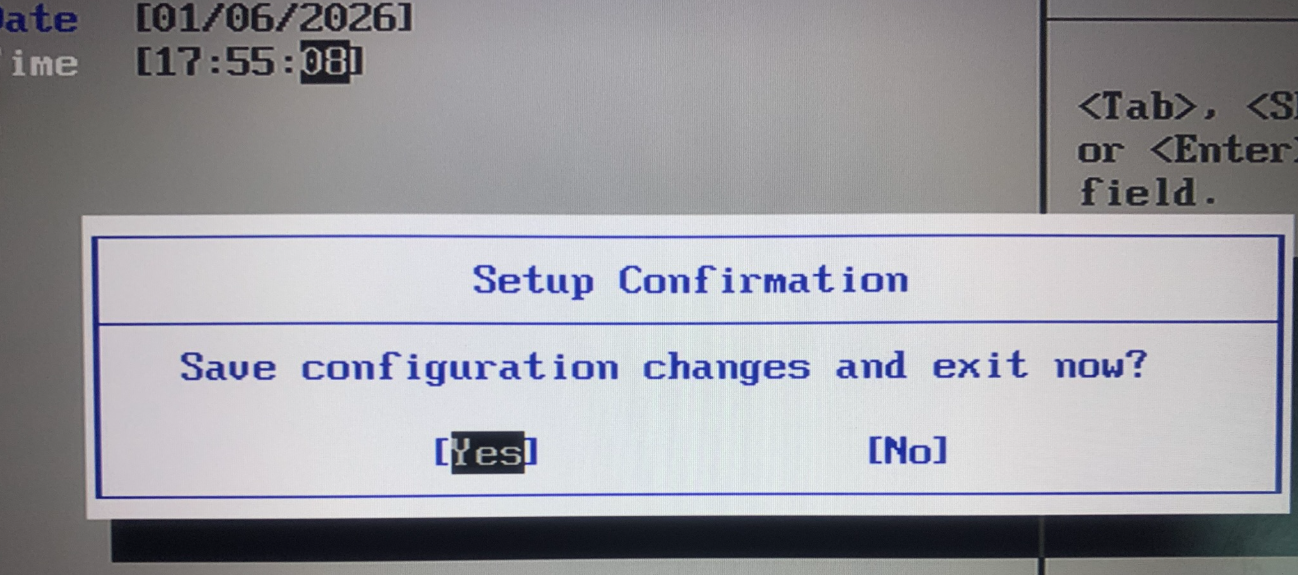
You might want to load factory defaults of the laptop after the reboot especially if it was used in a corporate environment. Those corporate laptops have strange settings which sometimes cause them to misbehave with a different OS. I personally do not use Windows (and all of those laptops were Windows machines before) therefore I always CLEAN the Bios before setting the laptop up
I then turn off SECURE BOOT because I do not need this in Linux
For all you LINUX fans, I am sure you know how to clean up the Boot Manager List under linux (this is stored in your laptop NVRAM) , if needed I will create another article dedicated to this.
Enjoy your unlocked T480 and remember - you have every right to unlock and fix your own equipment !